HTML table에 스타일 적용하기
최근에 HTML table에 스타일을 적용할 일이 있었다.
보통은 table에 기능이 많이 필요하다면, 잘 만들어진 라이브러리를 사용할 것인데 이번에는 기능도 그렇게 많지 않았고 그냥 직접 그리고 싶은 마음에 라이브러리 없이 그렸다.
요즘에 나오는 책들은 어떨지 모르겠지만 처음 HTML을 배웠을 때 레이아웃도 table로 잡는 경우가 많았기 때문에 목차에 꼭 들어가 있었다.
그래서 "테이블 그거 쓱쓱 그리면 되지."라고 생각했는데 나는 내 생각보다 table을 원하는 방식대로 그리지 못하는 점이 문제였다.
라이브러리를 사용하면 쉽겠지만 혹시 또 이런 상황을 겪는 사람이 있을 수 있고, 그게 또 내가 될 수 있으니 이번 기회에 기록해 둔다.
table 테두리 넣기
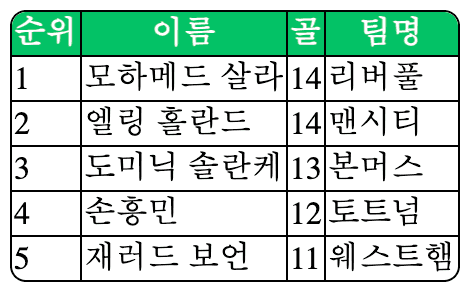
아래에 스타일을 적용하고 싶은 table을 그려봤다. (데이터는 2024년 01월 03일 기준이다...)
<html><body><table><thead><tr><th>순위</th><th>이름</th><th>골</th><th>팀명</th></tr></thead><tbody><tr><td>1</td><td>모하메드 살라</td><td>14</td><td>리버풀</td></tr><tr><td>2</td><td>엘링 홀란드</td><td>14</td><td>맨시티</td></tr><tr><td>3</td><td>도미닉 솔란케</td><td>13</td><td>본머스</td></tr><tr><td>4</td><td>손흥민</td><td>12</td><td>토트넘</td></tr><tr><td>5</td><td>재러드 보언</td><td>11</td><td>웨스트 햄</td></tr></tbody></table></body></html>
행과 열을 구분하기 어려우니, css로 border를 적용하자.
table,th,td {border: 1px solid black;}
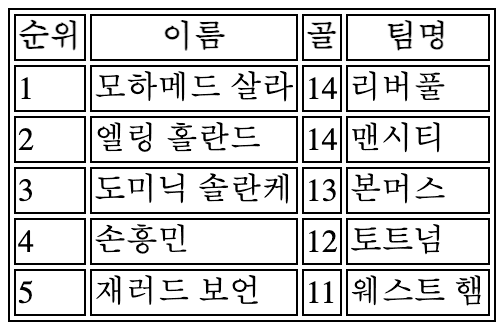
결과는 다음과 같이 나온다.
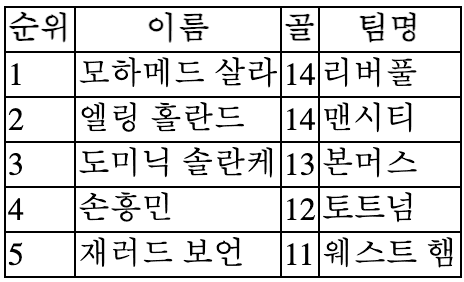
그런데 각 border 사이 틈은 원하지 않을 수 있다. 이때 table의 border-collapse 속성에 collapse를 설정하면 인접한 셀들은 테두리를 공유하게 된다.
table {border-collapse: collapse;}th,td {border: 1px solid black;}
table border를 둥글게 만들기
요즘 UI들은 테두리가 둥근 것이 많다. 나도 table 바깥 테두리를 둥글게 설정해야 했다.
하지만 지금 상태에서 table에 border-radius를 설정해 봐도 테두리는 둥글게 할 수 없다. table에는 border가 없기 때문이다.
table {border-collapse: collapse;border-radius: 8px;}th,td {border: 1px solid black;}
전체 th, td에 border-radius를 추가해 봤지만 모습은 그대로였다. border-collapse: collapse; 와 공존할 수 없나 보다.
table {border-collapse: collapse;}th,td {border: 1px solid black;border-radius: 8px;}
찾은 방법 중 box-shadow를 사용하는 것이 있다.
아래와 같이 적용하면
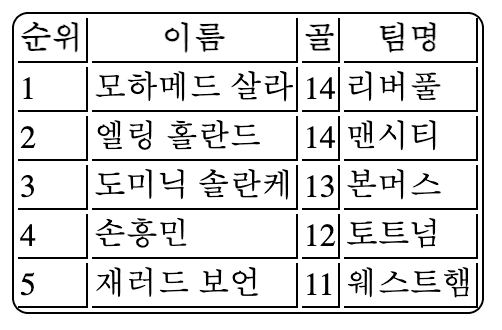
table {border-collapse: collapse;box-shadow: 0 0 0 1px black;border-radius: 8px;}th,td {border: 1px solid black;}
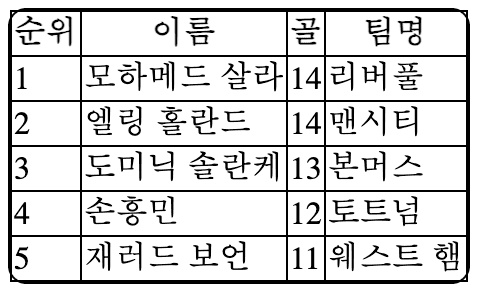
기존 border와 함께 둥글게 설정된 box-shadow를 볼 수 있다. 기존 border를 겉 테두리에서 보여주고 싶지 않으니 border: hidden;을 추가한다.
table {border-collapse: collapse;box-shadow: 0 0 0 1px black;border-radius: 8px;border: hidden;}th,td {border: 1px solid black;}
두 번째로 table에도 border를 설정하고, 각 th, td에 border를 right, bottom에만 설정하는 방법이 있다.
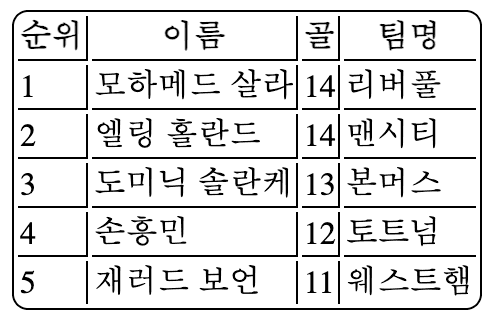
table {border-radius: 8px;border: 1px solid black;}th,td {border-right: 1px solid black;border-bottom: 1px solid black;}
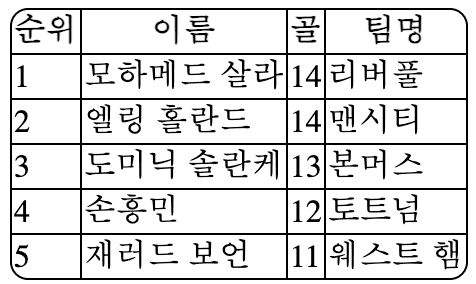
th와 td에 right과 bottom에만 테두리를 설정하면 다음과 같은 표가 그려진다.
th:last-child,td:last-child {border-right-width: 0;}tr:last-child td {border-bottom-width: 0;}
th, td는 하나의 tr에 묶인다. 그중 가장 마지막 자식 요소의 border-right-width: 0;을 적용하면 table의 우측 테두리와 겹치는 부분이 없어지고, table 내 가장 마지막 tr에 존재하는 td의 border-bottom-width; 0;을 적용하면 table의 하단 테두리와 겹치는 부분이 사라진다.
각 셀 사이 틈이 존재하기 때문에 border-collapse: collapse;를 설정해버리면 앞서 살펴본 것처럼 border-radius와 충돌하기 때문에 이 틈을 메꾸는 다른 방법이 필요하다.
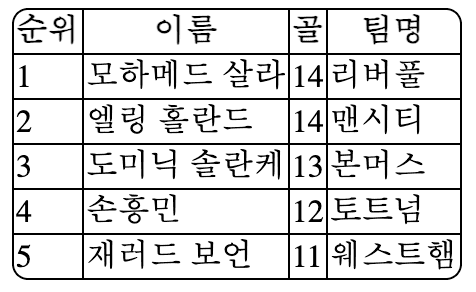
CSS의 border-spacing 속성은 <table>에서 인접한 셀 테두리 사이 거리를 설정한다. 그래서 0으로 설정하면 테두리 사이 틈이 메꿔질 것이다.
table {border-radius: 8px;border: 1px solid black;border-spacing: 0;}
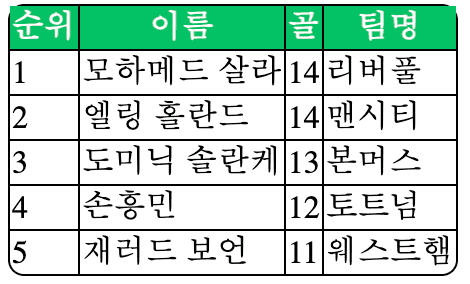
"잘 되었군..." 하고 테이블 헤더만 색상을 변경하고 싶어서 background-color를 설정했더니, 셀이 테두리에서 삐져나온 모습을 볼 수 있었다!
table {border-spacing: 0;border-radius: 8px;border: 1px solid black;}th,td {border-right: 1px solid black;border-bottom: 1px solid black;}th {background-color: #0ac266;color: white;}th:last-child,td:last-child {border-right-width: 0;}tr:last-child td {border-bottom-width: 0;}
어떤 요소의 내용이 너무 클 때 overflow로 처리했었다는 것이 기억났다.
table {border-spacing: 0;border-radius: 8px;border: 1px solid black;overflow: hidden;}th,td {border-right: 1px solid black;border-bottom: 1px solid black;}th {background-color: #0ac266;color: white;}th:last-child,td:last-child {border-right-width: 0;}tr:last-child td {border-bottom-width: 0;}
table 요소의 내용이 넘치는 경우 hidden 을 사용해 내용을 잘라낸다.
table에 스크롤 적용하기
데이터가 많아지면 테이블의 크기는 고정한 채 세로 스크롤을 적용하고 싶을 수 있다.
선수들의 순위는 골이 같으면 같은 것으로 정하고, 10위까지 추가했다.
우선 웹에서 스크롤은 어떻게 해야 생겨나는 건지 궁금했다. 여기서 "Block formatting context(이하 BFC)"라는 새로운 용어를 알게 되었다.
BFC는 CSS에서 box model을 형성하는 요소들을 배치하는 방식을 규정하는 개념인데, BFC는 블록 레벨 요소들이 서로 상호작용하는 방법을 결정하고 레이아웃을 조정하는 데 중요한 역할을 한다.
여기서 블록 레벨 요소란, 보통 한 줄 전체를 차지하며, 세로로 쌓이는 특성을 가진 요소를 말한다. <div>나 <p> 같은 것들이다.
블록 레벨 요소에 overflow: scroll를 적용하면 넘치는 콘텐츠를 스크롤 할 수 있는 영역을 가진다. 해당 요소 내 자식 요소들이 부모 요소의 외부 영역을 뚫지 못하고 내부에 갇히게 된다.
전체 table 스크롤
<table> 요소의 display 기본값은 table이다. 그래서 BFC를 형성하지 않는다. 따라서 overflow: scroll을 설정해도 스크롤은 생기지 않는다.
display 속성을 block 으로 지정하면 스크롤이 가능해지지만, display: table이 아니기 때문에 테이블 레이아웃이 깨진다. 테이블의 셀은 가능한 가장 작은 크기로 작아지게 된다. 그래서 width를 지정해 줘야 한다.
table {border-spacing: 0;border-radius: 8px;border: 1px solid black;overflow: scroll;display: block;height: 300px;width: 340px;}
셀의 내용이 너무 길어지더라도 줄바꿈 되지 않도록 white-space: nowrap;도 추가한다.
thead,tbody {white-space: nowrap;}
마지막으로 table을 스크롤 할 때 thead 부분은 고정시키기 위해 position: sticky;를 추가한다.
thead {position: sticky;top: 0;}
tbody 스크롤
앞에서 생성된 스크롤은 table header가 고정되어 있긴 하지만 table 전체를 아우른다.
tbody에만 스크롤이 생성되어야 하는 요구사항이 있었다.
tbody에 display: block;을 해주면 table에 설정한 것처럼 레이아웃이 깨져서 thead, tbody의 정렬이 맞춰지지 않는 문제가 있어 각 th, td 에 width를 고정한다.
th:nth-of-type(1),td:nth-of-type(1) {width: 40px;}th:nth-of-type(2),td:nth-of-type(2) {width: 140px;}th:nth-of-type(3),td:nth-of-type(3) {width: 40px;}th:nth-of-type(4),td:nth-of-type(4) {width: 200px;}
하지만 정말 성가시게도 셀을 rowspan을 사용해 병합하면 thead, tbody의 정렬이 맞춰지지 않는다.
셀을 병합했을 때도 깨지지 않으려면 JavaScript의 도움이 필요하다.
tbody 첫 tr에 존재하는 td들의 CSS 속성 중 width를 window.getComputedStyle 메서드를 사용해 구한다.
const table = document.querySelector('table')const bodyCells = table.querySelectorAll('tbody tr:first-of-type > td')// table body의 모든 cell을 가져온다.if (bodyCells.length > 1) {const colWidth = [...bodyCells].map((cell) => {const computedStyle = window.getComputedStyle(cell) // width 구하기return computedStyle.width})}
구해진 width를 각 th에도 순서에 맞춰 설정해 주면 된다.
const headers = table.querySelectorAll('thead tr > th');[...headers].map((th, idx) => (th.style.width = colWidth[idx]))
이 script를 window의 resize 이벤트 리스너에 연결해 주면 table 요소의 width도 100%로 설정할 수 있다.
지금 작업한 것은 완벽하지 않다. 필요한 부분만 공부하고 작업한 것이다. "이랬으면 좋겠다", "저랬으면 좋겠다" 할 때마다 생각하는 대로 표현되지 않았다. 이건 그동안 다른 UI를 그릴 때도 마찬가지였다. CSS는 알다가도 모르겠다고 느꼈다. 기회가 될 때마다 어떤 UI든 계속해서 그려보는 연습을 하는 수밖에 없겠다는 생각이 들었다.
reference
- The Table element
- https://blog.naver.com/handam81/222336995291
- https://stackoverflow.com/questions/628301/the-border-radius-property-and-border-collapsecollapse-dont-mix-how-can-i-use
- Block formatting context
- HTML 테이블 tbody 스크롤 적용
- https://stackoverflow.com/questions/17067294/html-table-with-100-width-with-vertical-scroll-inside-tbody

